Can You Change the Battery in a Pixel Phone
Introduction
Utilise this guide to replace the battery in your Google Pixel. With daily use, a typical battery volition terminal around 18-24 months before losing significant capacity. If your telephone has to exist recharged constantly or turns off suddenly, replacing the battery may exist a solution.
Warning: Because of the strong adhesive securing the display, minimal clearance for inserting your tools, and high heat required, in that location is a good chance of accidentally dissentious your display during this procedure. Unless you programme to replace your display in conjunction with this repair, work very carefully and be prepared to replace the display, should information technology not work upon reassembly. Follow the instructions carefully and notice all warnings to increase your odds of success.
Before disassembling your phone, discharge the battery below 25%. A charged lithium-ion bombardment can catch burn down and/or explode if accidentally punctured. If your battery is swollen, have appropriate precautions.
The battery is held in place by very stiff adhesive. You may need to use high concentration (over xc%) isopropyl alcohol in social club to loosen the bombardment from the phone.
-
-
Plow off the device.
-
Set up an iOpener to heat the edges of the display and soften the adhesive underneath. Alternatively, yous may apply a oestrus gun or a pilus dryer.
-
-
-
For reference, the back of the display panel is shown at left. Note the narrow clearance between the side of the display unit and the OLED console. (The bezels bespeak this spacing on the front.)
-
-
-
Utilise a suction handle to pull up on the brandish and create a slight gap between the display and the phone'south chassis.
-
You may need to apply more heat if this doesn't come up. Don't exist impatient, this will take time. Once y'all tin can gently insert a tool in the gap, move on to the adjacent stride.
-
-
-
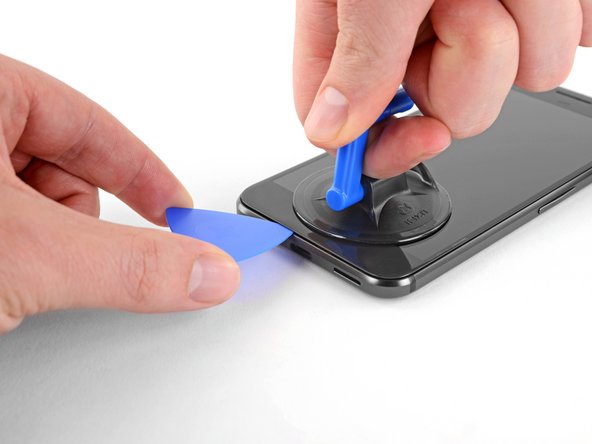
Insert an opening pick or a playing card into the gap between the chassis and the display assembly.
-
Begin to slide the opening pick around the edge of the brandish, cutting through the adhesive that secures it.
-
-
-
Keep advisedly separating the adhesive effectually the remainder of the device.
-
-
-
With the adhesive cut, slowly lift the display upwards from the height (the side with the speaker-grille cutout), advisedly flip information technology over vertically toward the bottom of the device, and residuum it on its face, as shown.
-
-
-
Utilise a T5 Torx driver to remove the two black 3.5 mm T5 screws securing the display cable connector bracket.
-
-
-
Use tweezers to remove the bracket that holds the display connector in place.
-
This is only a piece of metal, and should come up very easily. (The cablevision is removed in the next stride.)
-
-
-
Use a spudger to pry upward the brandish cable connector, freeing the display.
-
-
-
Remove the brandish.
-
-
-
Use a T5 Torx commuter to remove the nine three.5 mm screws securing the midframe.
-
-
-
The midframe is held tightly in place by five clips. To release these clips, apply inward pressure with an opening tool every bit shown in the steps below.
-
-
-
Wedge an opening pick into the notch that is located at the bottom right corner of the phone.
-
-
-
Slide the opening pick up both sides of the device in the minor infinite betwixt the midframe and the rear case to release the clips property it in identify.
-
-
-
Apply a spudger to pry the earpiece speaker cable connector straight up, disconnecting information technology from the motherboard.
-
Remove the mid-frame from the device.
-
-
-
Employ a spudger to pry up the bombardment ribbon cablevision, disconnecting information technology from the motherboard.
-
-
-
Using tweezers, peel back the silver tape that covers the cable connecting the motherboard to the daughterboard. Peel just enough to see the connector underneath.
-
Use a spudger to pry the connector straight up and disconnect it from the motherboard.
-
-
-
Peel up the sticker covering the interconnect cable on the daughterboard side.
-
Use a spudger to disconnect the cablevision from the daughterboard.
-
Remove the cable from the device.
-
-
-
The battery has a jacket that can double as a battery removal tab, pull information technology to remove the bombardment. If that doesn't work, follow the instructions below.
-
Advisedly wedge an opening pick underneath the battery to break the adhesive.
-
If the battery does non come out easily, don't pry aggressively. Apply heat to the dorsum of the phone with an iOpener or a heat gun to loosen the adhesive.
-
-
-
Remove the battery.
-
Remove any remaining agglutinative from the telephone, and make clean the glued areas with isopropyl alcohol and a lint-free material.
-
Secure the new battery with pre-cut agglutinative or double-sided adhesive tape. Apply the new adhesive to the phone, not direct onto the bombardment.
-
Press the new battery firmly into place for v-x seconds.
-


Conclusion
Compare your new replacement part to the original part—you may need to transfer remaining components or remove adhesive backings from the new part before installing.
To reassemble your device, follow the in a higher place steps in contrary society.
After completing this guide, calibrate your newly-installed battery.
Take your e-waste to an R2 or e-Stewards certified recycler.
Repair didn't go as planned? Check out our Answers customs for troubleshooting assistance.
Embed this guide
Choose a size and copy the code below to embed this guide as a small widget on your site / forum.
Preview
Source: https://www.ifixit.com/Guide/Google+Pixel+Battery+Replacement/89128
0 Response to "Can You Change the Battery in a Pixel Phone"
Post a Comment